AKA Thomson MO6
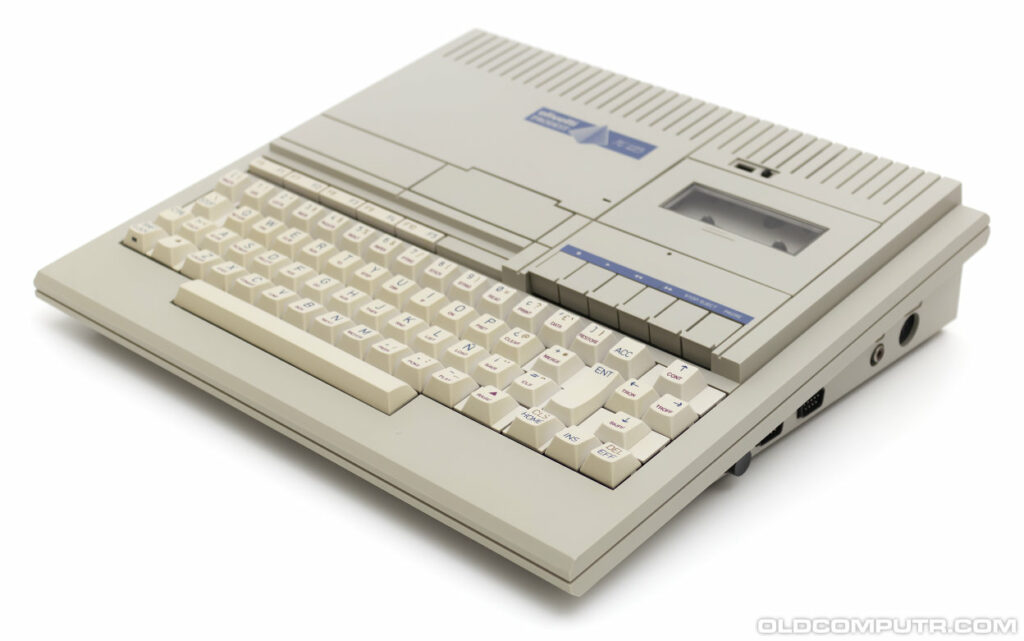
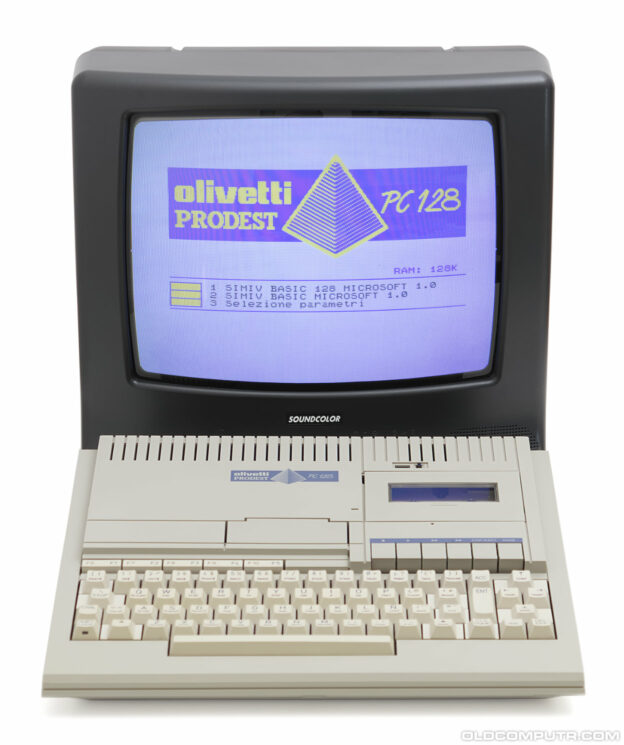
I recently bought this computer at the local flea market. I still wonder why Olivetti put that thing on the market when the Commodore 64 and Sinclair ZX Spectrum were selling like hotcakes. And it wasn’t even something Olivetti designed or produced – it was just a rebadged Thomson MO6.
A lot of things have happened in my life in the last few years; I don’t have as much free time as I used to have, but I miss cleaning dusty things from the 80s and posting on the site. So enter the Olivetti Prodest PC 128!
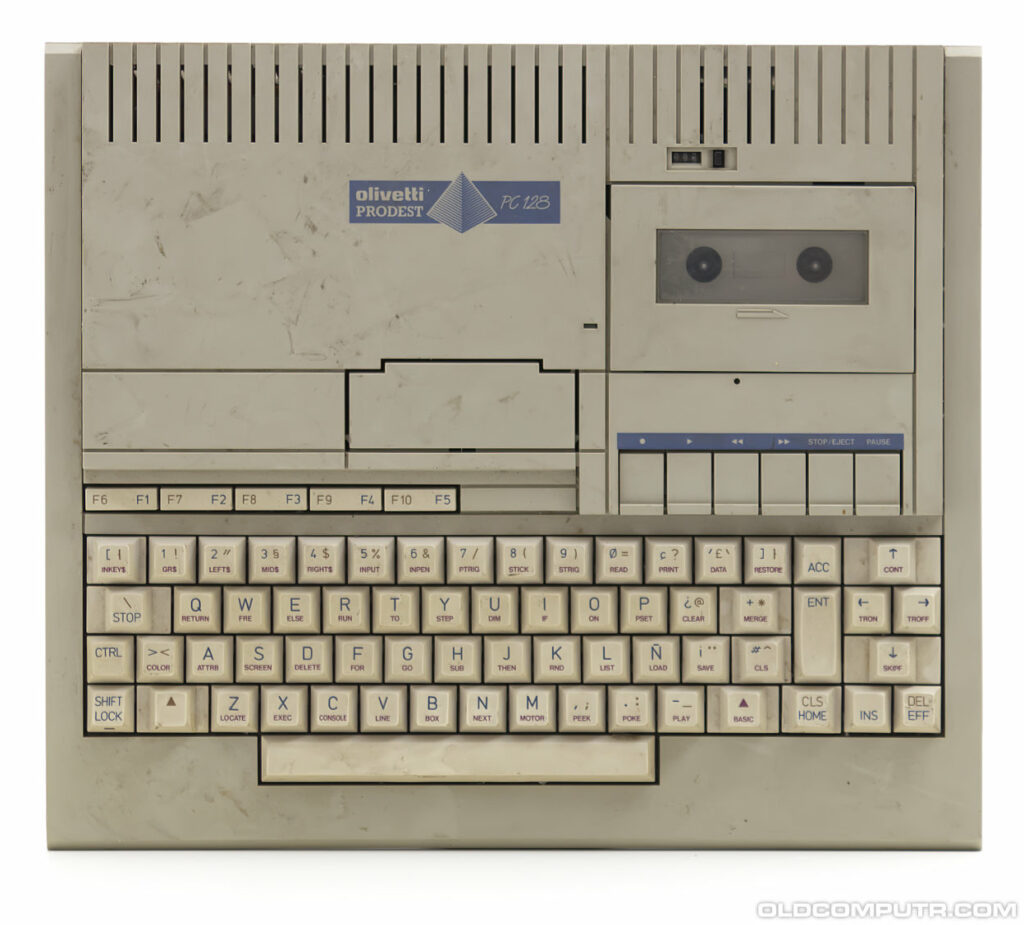
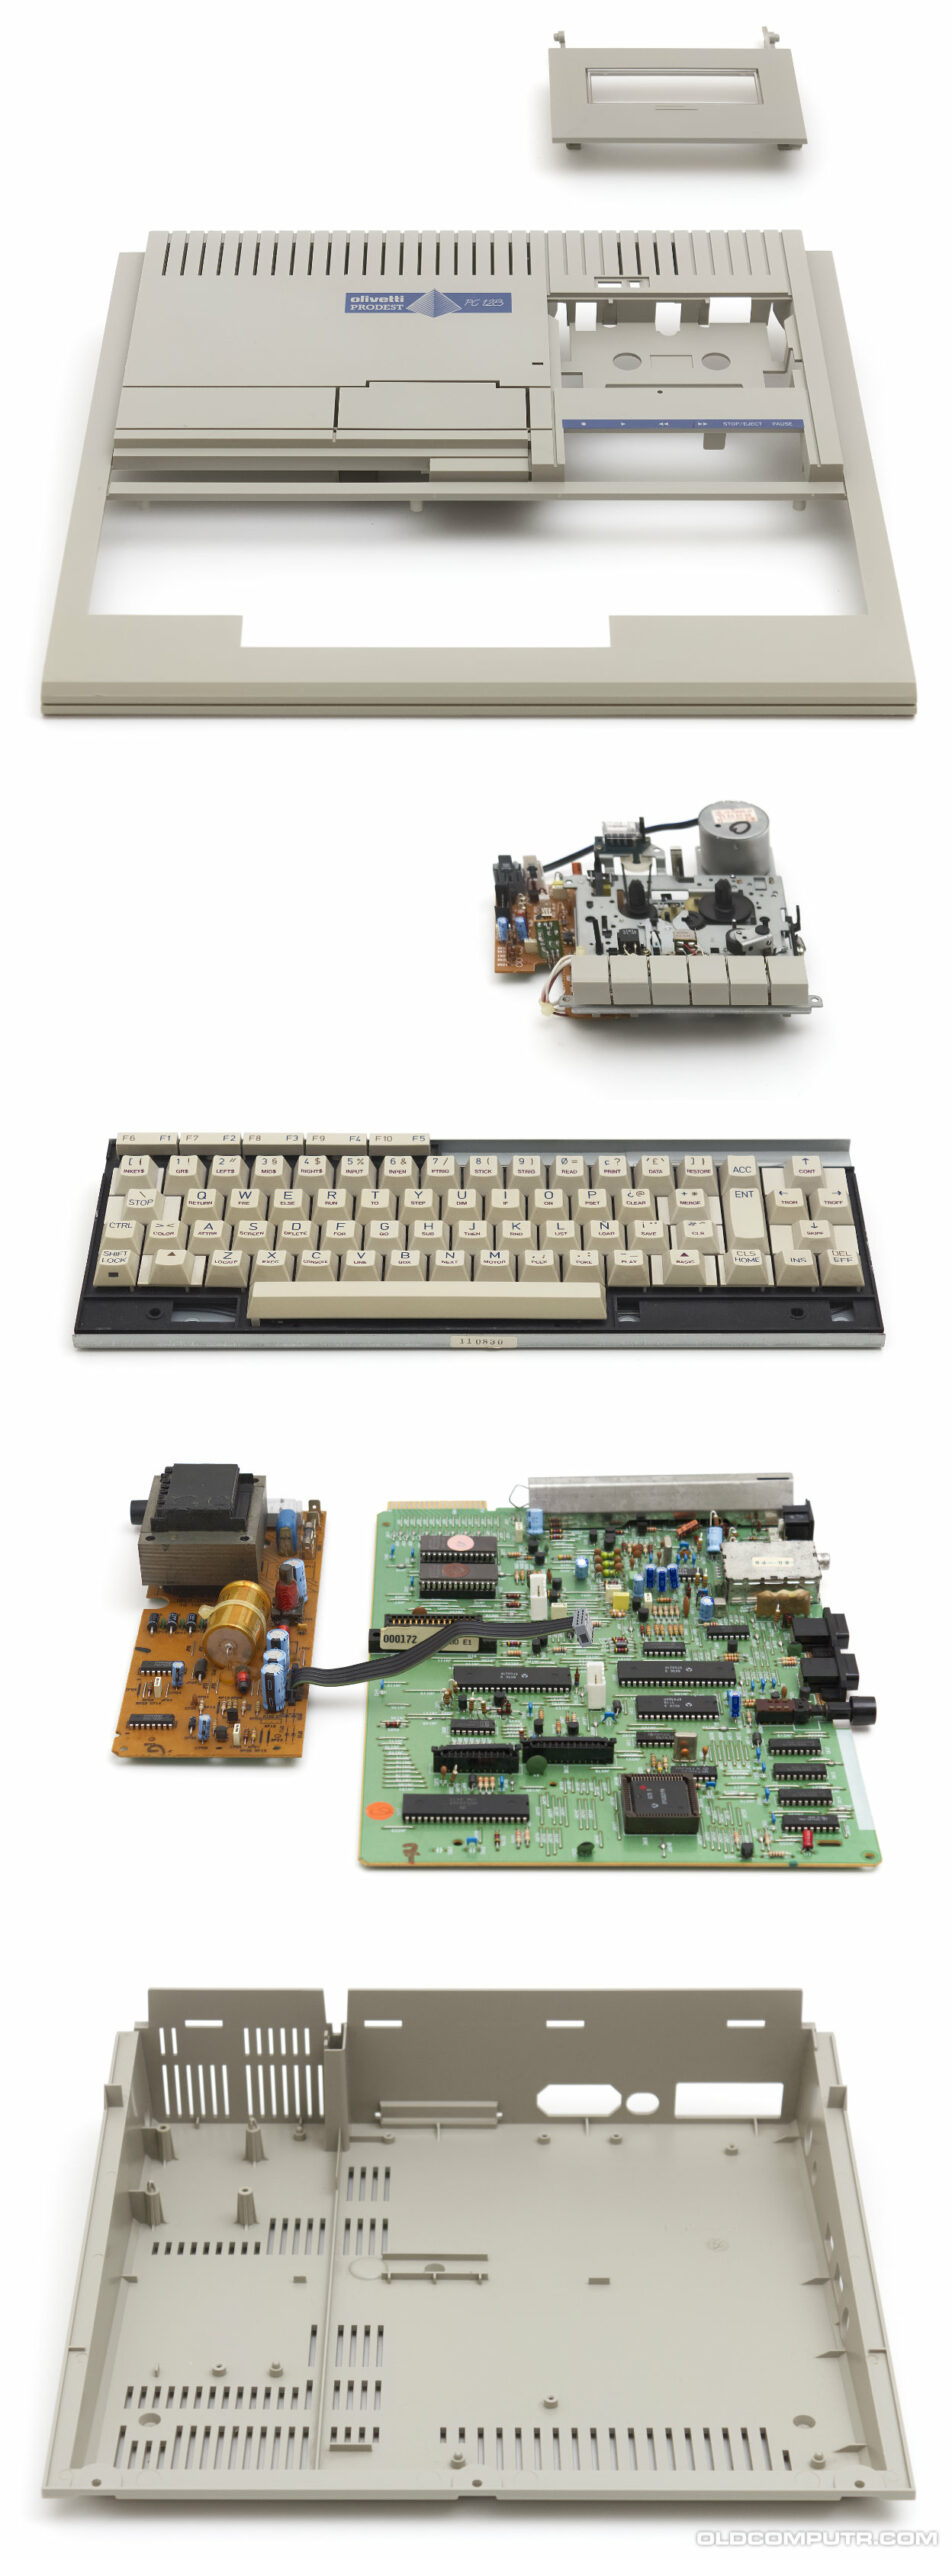
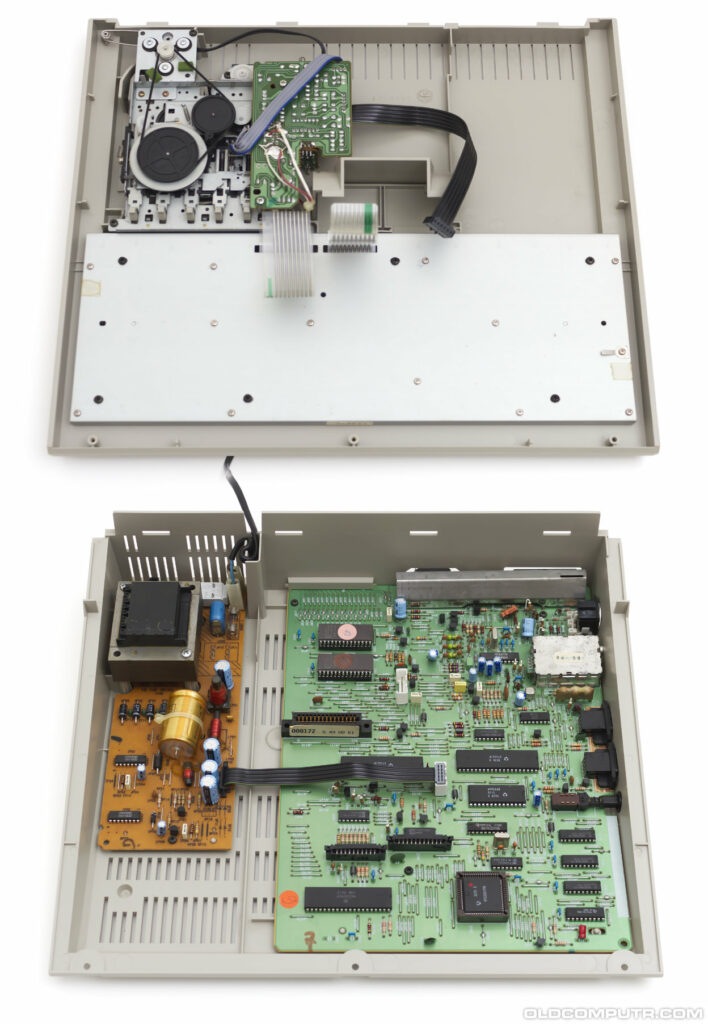
Quite dusty, isn’t it? As usual, I took it apart before even trying to turn it on. I didn’t notice any problem on the motherboard. And I certainly didn’t notice the 35 years old filter capacitor on the power supply unit. I am used to the RIFA ones but this was a nice light blue thing near the transformer. Here’s the exploded (no pun intended) view:
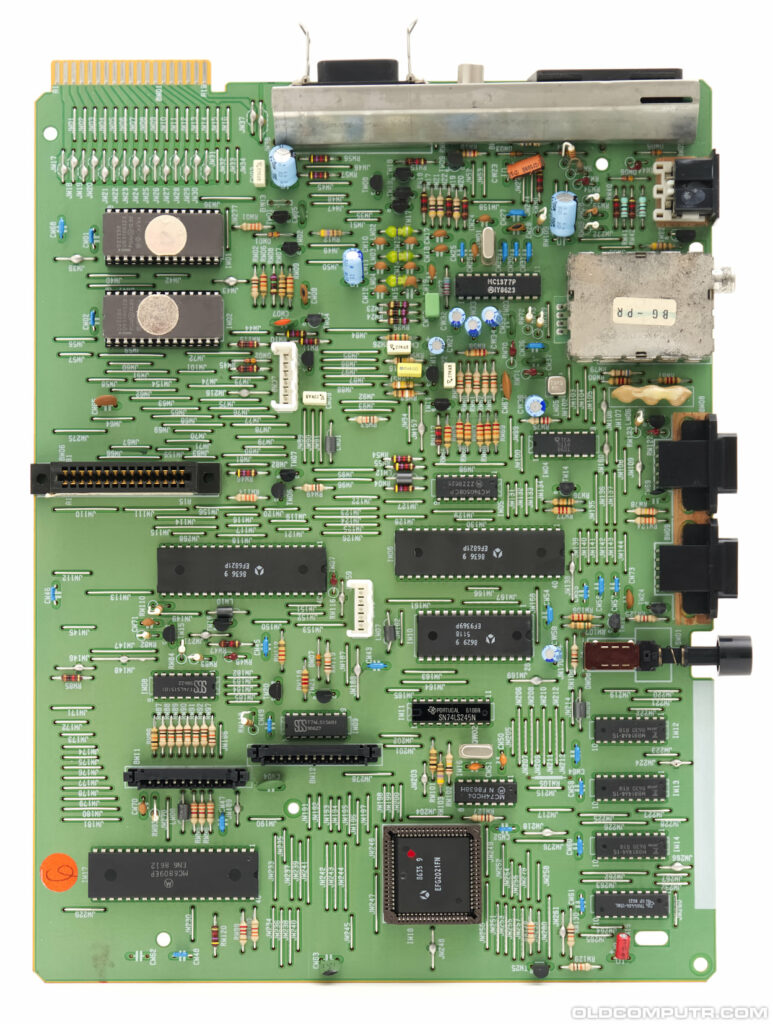
As you can see, the system is based on the Motorola 6809 CPU.
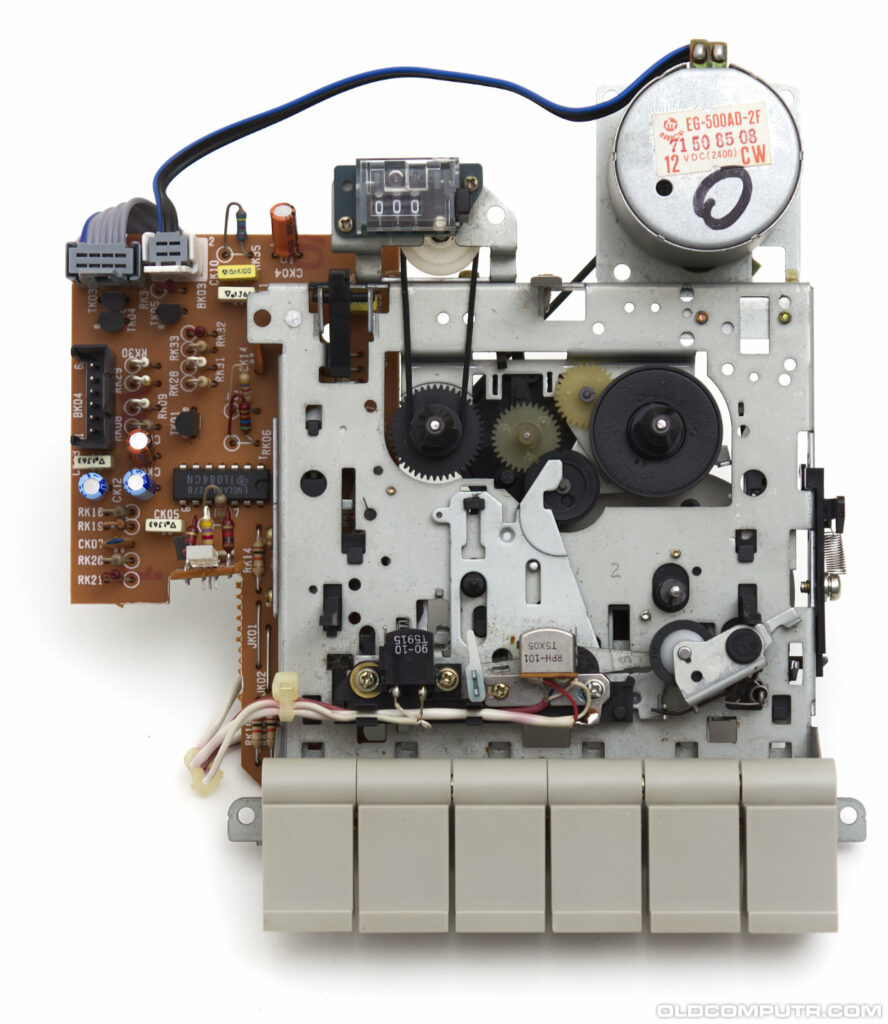
Disk drives were quite expensive at the time; for many 8-bit systems, the cassette was the only affordable mass storage media, and many computers came with a tape unit. The record button was broken – I suspect that the seller “tested” every button: “oh why doesn’t this one go down… let me try harder… (SNAP)… look, I fixed it”. I used a dremel tool to make a hole on both sides of the button hook and then inserted a piece of thick paperclip to act as a reinforcement. I swapped the record button with the stop one because the latter doesn’t need to push any mechanism in place and needs less force to work.
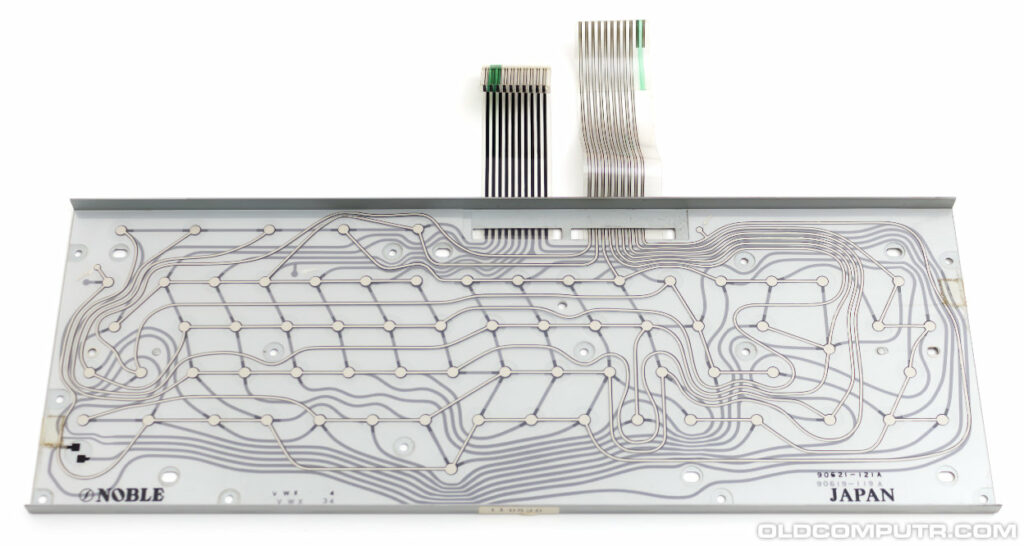
Don’t try to remove the keycaps from the top of the keyboard, especially the space bar: you can easily break the small hooks that attach the space bar to the underneath iron wire. And pay attention not to flip the keyboard or all the tiny little springs will fall down on the floor… and you could spend the next five minutes under the table looking for the last two springs. As you probably guessed, I almost broke one of the space bar hooks and I flipped the keyboard. I had to open the keyboard just to put the space bar back in place.

But al least you can see the inside of the keyboard.
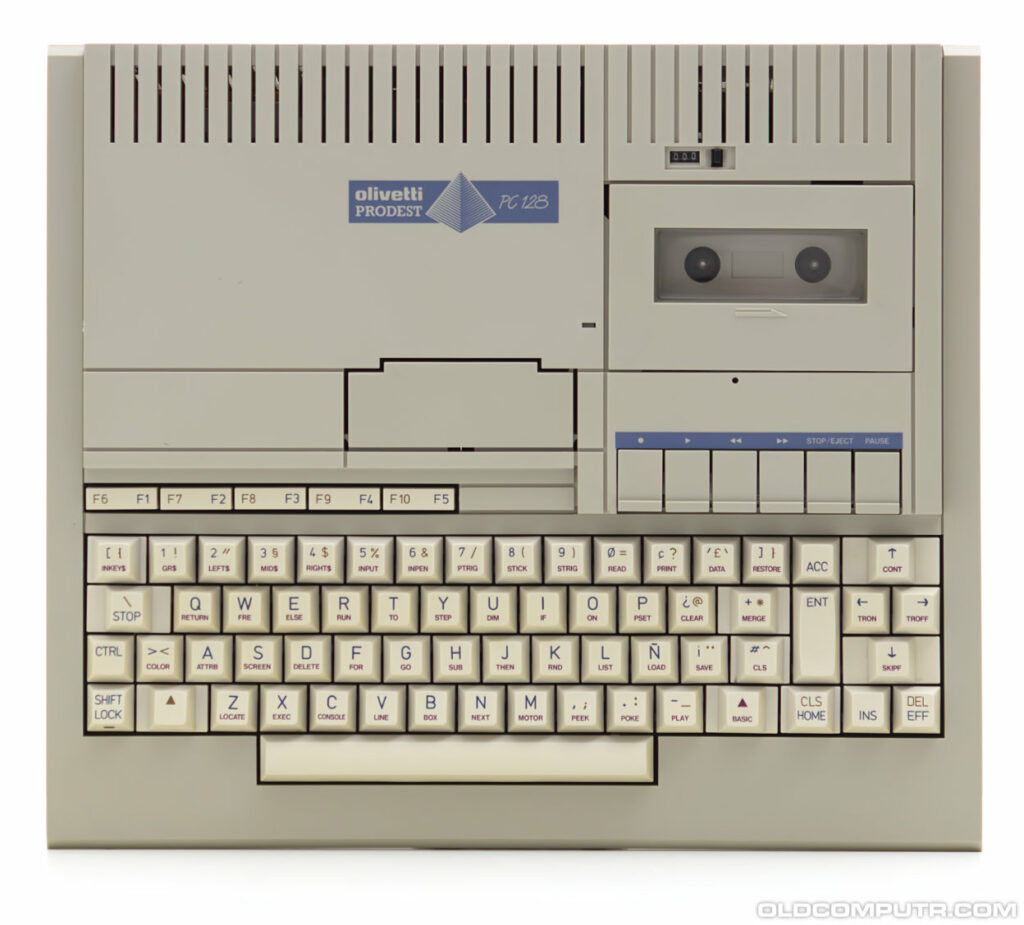
These are the two halves of the computer after being cleaned and assembled again.
On the right side there is a reset button, a couple of joystick ports, the RF video output and a light pen port.

On the back there’s the SCART A/V output, a mono audio out, a printer port and an expansion connector.

Look at that! Nice and clean. Time to turn it on.
It worked, but just as I started to type a small BASIC program I heard a noise like 10 mosquitos being fried at the same time by a zapper on a summer night, then the smoke came out from the case. Stinky, thick, oily smoke. Turn the computer off, close the door, open the window. It had happened to me before and I know that I have to act fast if I want the smell to go away in a week rather than in a month.
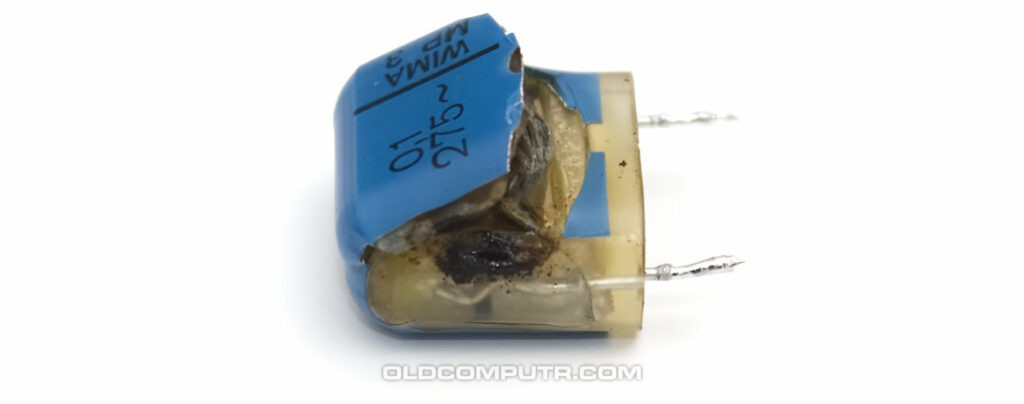
So I had to start over and disassemble – and clean – everything from scratch. I recognise RIFA filter capacitors, now I know the WIMA ones too. It used to be there, at position CP01.
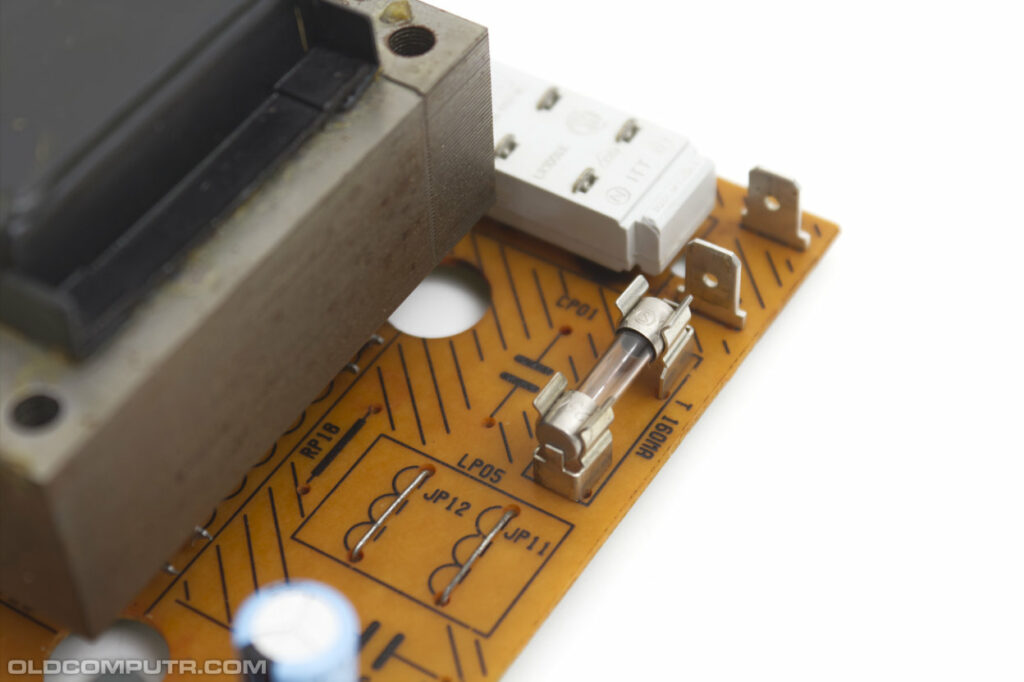
For now I just removed the filter capacitor without replacing it: I don’t plan to use this computer very often.
Discover more from Oldcomputr.com
Subscribe to get the latest posts sent to your email.
Great job, and (as always) great photo’s. What I fnd remarkabel about this machine is the amount of wire bridges on the PCB. Obviously it was cheaper to manually put in all these links than it was to manufacture a three layer PCB.
I still have a MO5 somewhere that I bought years ago and have not started it up since. I think I’ll check the capacitors first before giving it a try. ;-)
Leterer numbers signs in voice sincronization .